Kumihimo braiding is an ancient art form, and one that is quite beautiful. I bought supplies a few years ago, made one rope then tucked it all away. But a friend of mine who is just getting into kumihimo made me break out the supplies and start braiding again. So today’s post will be about the supplies you need if you want to try this. It’s actually pretty inexpensive, unless you’re like me and have to have silk and satin in every imaginable color (which is a whole other story).
What is Kumihimo, Anyway?
Kumihimo is the craft of braiding, and the name comes from Japan, where this really has been raised to an art form. Although other cultures also use braiding, today’s craft uses the Japanese name.
Once you have made the braided ropes, you can use them for a wide variety of purposes; however, jewelry is my focal point for this craft.
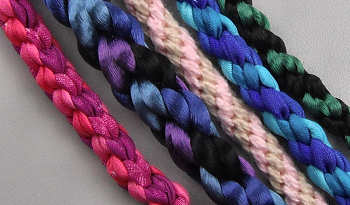
Above are 5 braids I’ve made. The one in the middle (pink and tan) I made long ago. The other four I made in maybe 3 hours. The shortest is 9 inches (the blue one, second from the right) and the longest is 19 inches – the big purple, blue and black one. I don’t know why I was thinking that the braiding took so long — it was close to instant gratification!
Kumihimo Supplies and Equipment
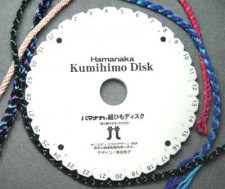
 What do you need for this jewelry-making craft? You need at a minimum a maru dai (wood or foam), cord, thread or ribbon. If you go inexpensive, with a foam kumihimo disk and satin cord (shown to the left), you can get away with spending maybe $25 for a basic kit. I have to admit, I get a lot of my stuff off Amazon, so here are some inexpensive kumihimo kits
.
If you go whole hog with a traditional maru dai, weights, bobbins and silk thread, it’ll be more like $250 to get started.
Now as to what you braid with; you’ll be using ribbon, cord or thread. It can be made from anything, although silk and satin are the most popular. In the photo at the top of the page, I used silk ribbon (the pink one to the far left and the blue one, second from the right). I used 3mm satin cord for the thick braid, and 1mm satin cord for the black and green braid, on the far right. And finally, the braid in the middle is made with cotton embroidery floss. While I do have some traditional silk, I haven’t dug into my stash yet.
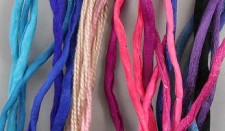
 I do suggest a size 0 or size 1 satin cord for your first project; it’s a whole lot easier to work with than cotton embroidery thread. It’s also pretty inexpensive. I think my next purchase will be for some size 1 satin cord (my samples used sizes 0 and 2). To the right are some silk ribbons, cotton thread and the size 2 satin cord.
Ultimately, you’ll also need some end caps or cones for your jewelry creations. These function to hide unsightly ends and attach a clasp.
I’ll be doing a basic tutorial soon, on a very simple pattern. Meanwhile, you can also find kumihimo books at Amazon (of course, I have a few). I personally buy my satin cord at The Satin Cord Store, but you can also try your local fabric or craft store. (You can get a foam kumihimo disk at either place as well.)
Well, let me get back to braiding and pick out the pattern I will demo (the hardest thing isn’t the braiding…it’s choosing the pattern and colors!). Be back later!
(It’s later now, and I have a kumihimo video tutorial for you.)
(It’s even later now, and you can check out the page on beaded kumihimo, too!)
how ca i get kumihimo tutorial books and insrtument needed?
Hi Elizabeth,
I’ve added a link in my Kumihimo Supplies and Equipment section for kumi kits. There’s also a link for some books and you can see my video tutorial as well. Hope this helps!!! 🙂
Gail